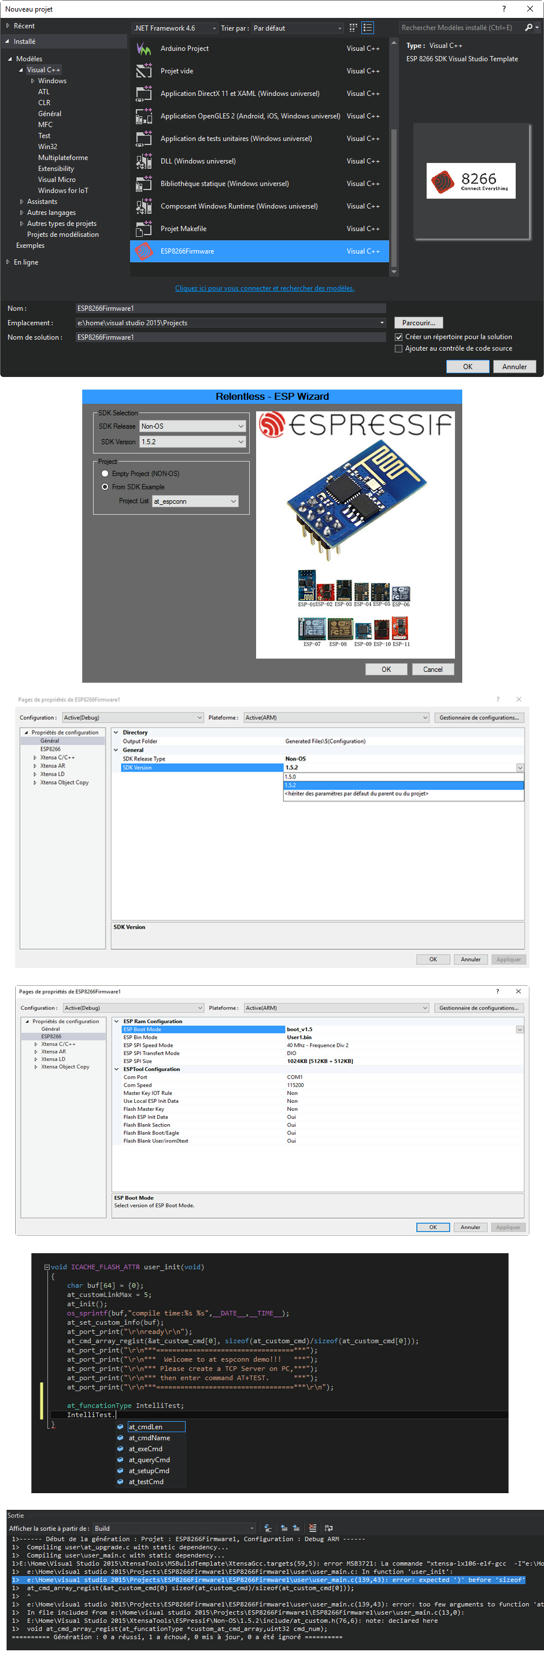
ESP8266 Wizard and Compiler tools for Visual Studio.
Develop ESP Firmware on Windows come easier.
Include
- VSIX Template Wizard
- RTOS 1.3.0
- RTOS 1.4.0
- RTOS 1.5.0
- NON-OS 1.5.0
- NON-OS 1.5.2
- NON-OS 1.5.4
- NON-OS 2.0.0
- ESPMesh 1.3.1
- ESPMesh 1.3.2
- ESPMesh 1.3.2b-09-2016
- ESPMesh 1.3.2b-12-2017
- Xtensa Compiler
- Don Kinzer Flash Utility
Compatibility tested
- Windows 10
- Visual Studio 2013, 2015 & 2017
- NON-OS 1.5.0 / 1.5.2 / 1.5.4 / 2.0.0
- RTOS 1.3.0 / 1.4.0 / 1.5.0
- ESPMesh 1.3.1 / 1.3.2 / 1.3.2b-09-2016 / 1.3.2b-12-2016
Release updates
- Version 1.0
- Initial launch
- RTOS Compatible
- Multi-project inside same solution
- Fix 0kb file for irom0.text.bin in non-boot mode
- Xtensa LD : Additional Library bug -> you can add airkiss in NON-OS 1.5.2
- Project Property override glitch
- ESP Flash Panel
- Don Kinzer Flash Utility
- Remove Old Concept from Boot Mode. Now V1.2/1.4/1.5 was build with NEW LD Script File
- ESP Flash Output Table
- Microsoft Visual Studio 2015 Intellisenses support
- Error List with line number inside output windows during build.
- Setup detect older version and uninstall VSIX properly.
- Fix LIB/LD Default folder (thanks to Reallife)
- Fix Release/Version default value was taken form wizard dialog interface.
- Include Non-Os 1.5.4
- Include RTOS 1.4.0
- Modify setup program (see: Installation troubleshooting)
- Extend VSIX Install Target to 11.0 to 16.0
- Include Non-Os 2.0.0
- Include RTOS 1.5.0
- EspTool Chip ID Detect, missing COM port and Baud speed (thanks to lele)
- COM Port string was replaced by a combo-list.
- COM Speed string was replaced by a combo-list.
- EspTool Reset option combo-list was now added.
- Place port and speed at begin of ESP_Tool.
- Reactive Intellisense inside VCX Project.
- Adding additional define in Xtensa C/C++ Menu.
- Adding ESP Mesh compatibility.
- First Open Source Version
- VSIX Installer Update
- Fix Design time error
Proposed ideas
- Compatible AtemlStudio 2017 (maybe incompatible, too much difference)
- Compatible Visual Studio Express (If you want support and ready to test it, write me)
- Serial Debugging with xtensa-lx106-elf-gdb.exe
Download
- http://www.mediafire.com/file/ixx48nhkob6ry6b/ESP8266_Wizard_1.3.1_-_OpenSource_%25281.0%2529.exe
Size 50 Meg
http://www.mediafire.com/file/vtxeg65q115amx7/ESP8266_Wizard_Package.rar
Size 51 Meg
Enjoy.
Installation troubleshooting
The Setup have completely changed, the package was not depend anymore of lasted Visual Studio installed on your computer. That's mean two new thing:
- Installation can be placed everywhere.
- Now, you can use on multi version of visual studio at the same time.
How Setup work
Setup was depend now to one variable : "InstallLocation". This one was placed into the registry during the installation.
On 64 bits Windows
Code: Select all
HKEY_LOCAL_MACHINE\SOFTWARE\WOW6432Node\Microsoft\Windows\CurrentVersion\Uninstall\ESP8266 Wizard_is1or on 32 bits Windows
Code: Select all
HKEY_LOCAL_MACHINE\SOFTWARE\Microsoft\Windows\CurrentVersion\Uninstall\ESP8266 Wizard_is1ESP8266Diag
For the moment any Diagnostic tools was created for this version.
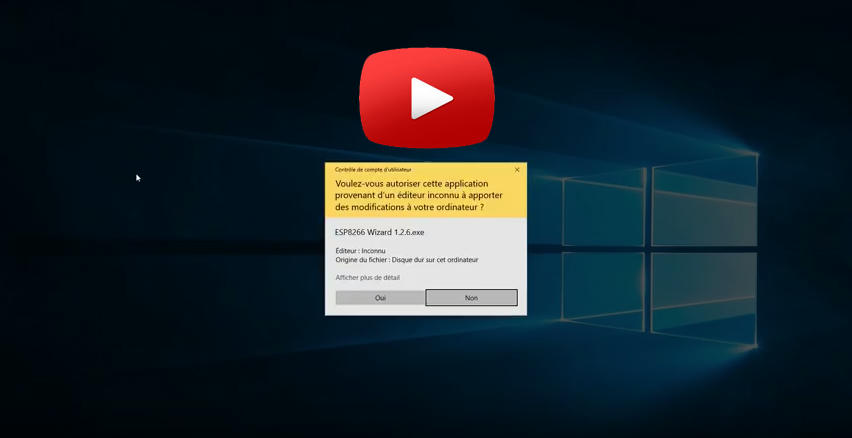
Video Tutorial
P.S. See some bug or need improvement, just reply me!
Open Source
After some comment, I decide to let go ESP8266 Wizard to Open Source. Feel free to modify, but it's gonna be under some rules. Before, let's understand the esp8266 Wizard.
1. Props vs XML vs targets
- Props : This files contains the default value of your properties interface
- XML : This files was the properties interface
- Targets : Inside this files, you gonna find the command line to execute the process on your CPP and H files Actually, if you handle well the concept, XTENSA folder can be recompiled inside a DLL, to convert targets command line based to DLL function.
2.Targets was queue based
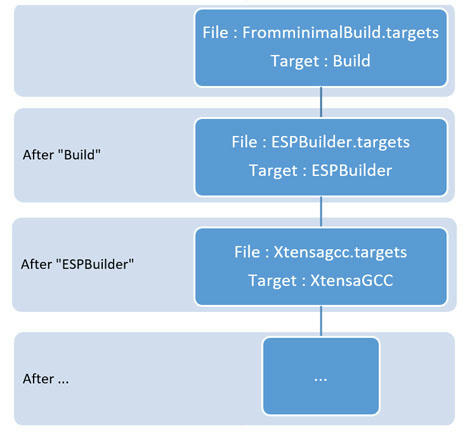
That's mean, this way was multi-project secure. You can have with another Microsoft project inside same solution. Take care to have unique name for every target, don't attempt to override "Build" target or something used by Microsoft. Also, by include FromminimalBuild.target you can create another builder like example "an Atmel compiler".
3.Windows 10 Partition and Writing Right
If you modify the package on windows 10, be sure that you don't install on same partition that Window 10. The new right of C: Partition, made in sort, that you must start your visual studio 2017 in administration mode. That's a little annoying.
4.The wizard use folder based
If you create a new SDK package. Try to keep in philosophy, that you need two sub-folder to keep compatibility with other project.
- ESPressif
- Release
- Version
5.How use REPACKAGE
- Unzip the downloaded file.
- Install a version inside Release folder. (Try to not use C: Drive)
- Modify the package (targets, XML and Props) directly inside Installation folder
- Put your paw and fill logbook... see below.
- If you modify the VSIX, don't forget to replace the .VSIX file from Release folder to Installation folder.
- When ready to repackage, start CopySources.bat script.
- Start InnoSetup (that you must find, download and install)
- Compile
6. Put your paw rules
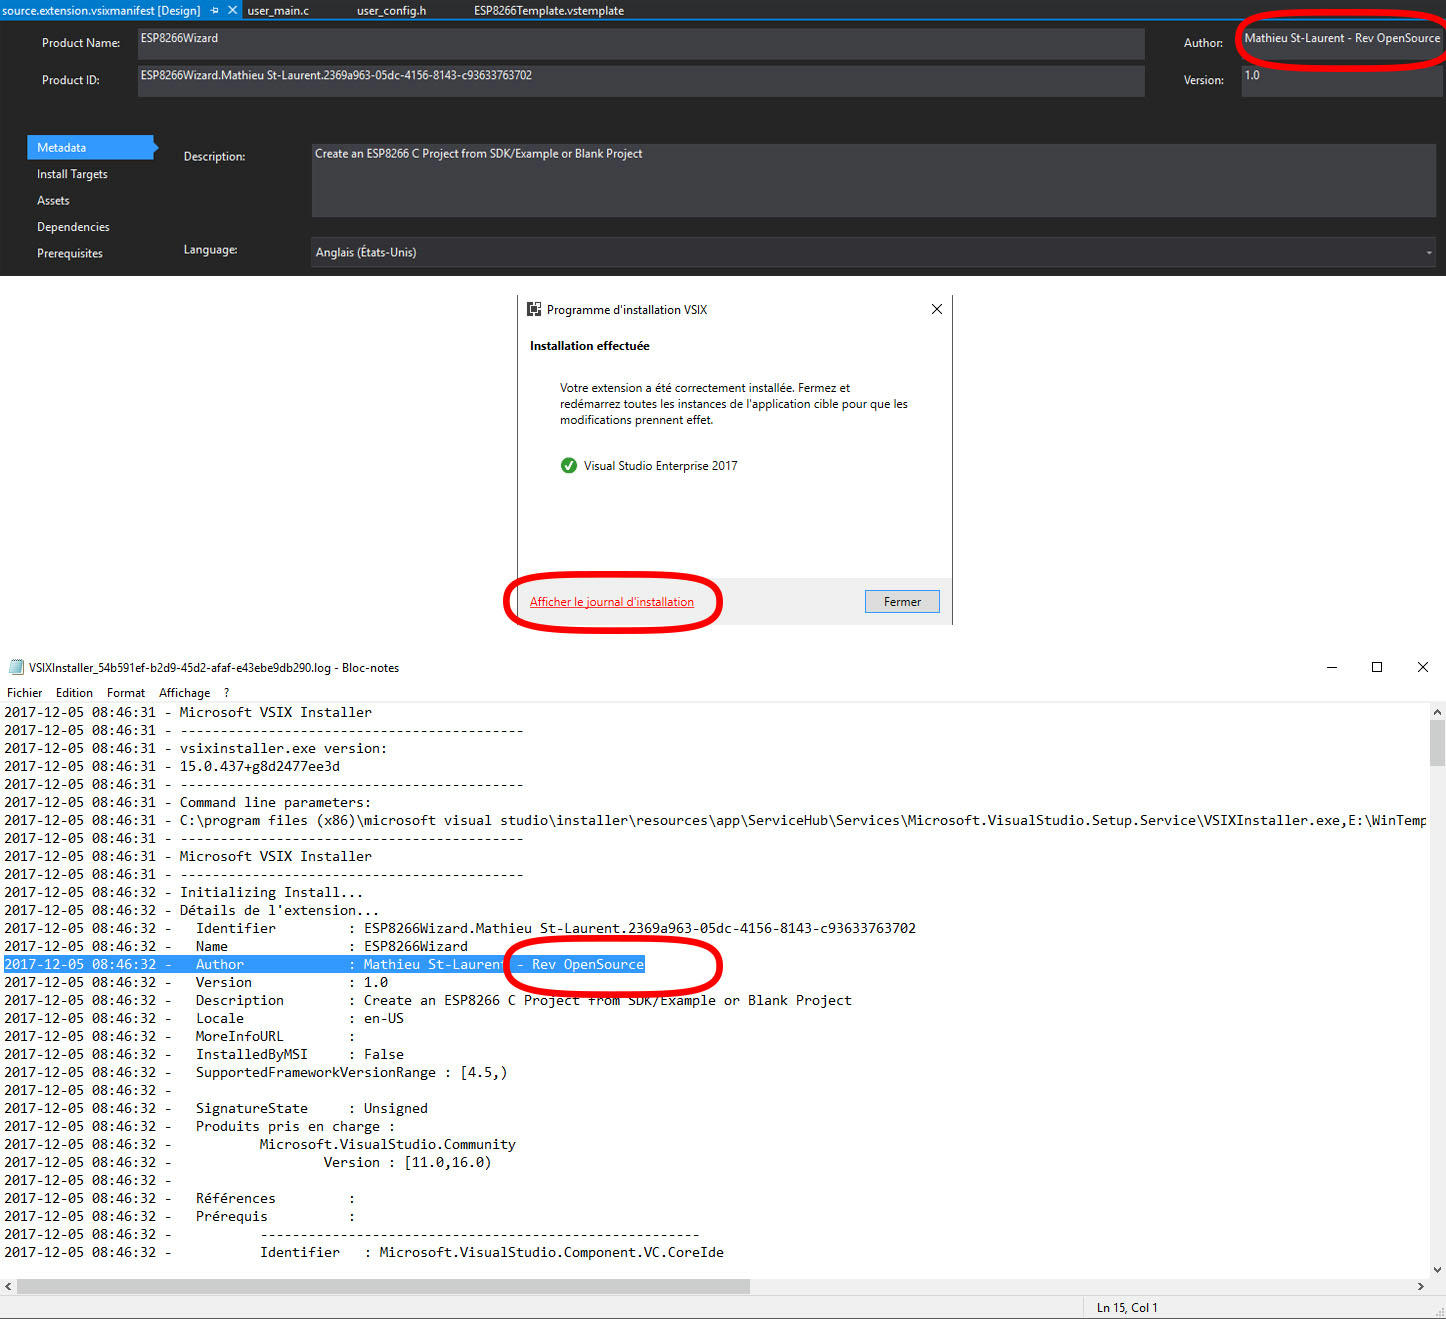
Because XML, PROPS and Targets can't be really compatible with Git or something similar. I mean, you can't keep trace of modification or branch. I ask you to put your paw at specific place to see which package you really install. Like this, we gonna be enable to see which part used during installation and we gonna be in mesure to offer support with specific version name.
Replace OpenSource by your name and change also the version. Change one place and the rest is automatic.
Inside Inno Setup:

Inside VSIX manifest:
7. Fill the LogBook
Modify the Logbook.txt to include date, package name, coder name and description of update item.
EX:
[YYYY/MM/DD] Package Name - Coder Name
* Fix that...
* Add this...
Enjoy!